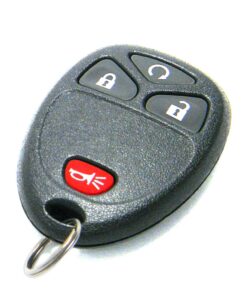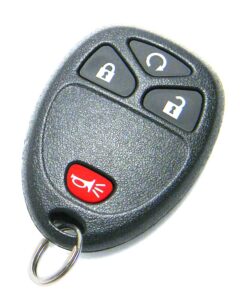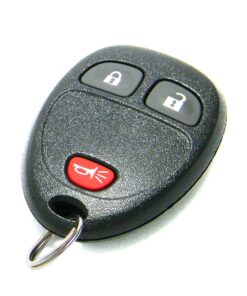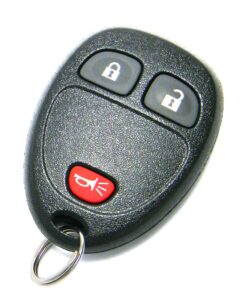
Easy to Follow Step-by-step Key fob remote Programming Instructions
2008 GMC Savana Van
We strive to provide convenience to our customers with free keyless entry remote fob programming instructions for every single vehicle that we sell on NorthCoast Keyless.
Many people don’t know that they can purchase their own replacement vehicle entry remote, save up to 70% off of marked up Dealership prices, and program the replacement remote to their vehicle themselves. We know how good it feels to save money and do something yourself; and we aim to make it as painless as possible for you!
Free Key Fob Remote Programming Instructions for a 2008 GMC Savana Van
Time needed: 5 minutes.
![]()
PROCEDURE #1 - VEHICLES WITH DRIVER INFO CENTER BUTTONStep-By-Step How To Programming Instructions
- Insert Key Into Ignition
INSERT key into Ignition and TURN the Ignition to ON/ACC (just shy of cranking engine).
- Enter Programming Mode – Step 1
PRESS and HOLD the DISP button on the Radio for 5-10 seconds UNTIL settings are displayed.
- Enter Programming Mode – Step 2
PRESS the SEEK up or down arrows UNTIL “FOB PROG” appears on the display.
- Enter Programming Mode – Step 3
PRESS the PREV or NEXT buttons to enter the sub menu. The menu will display BEGIN.
- Enter Programming Mode – Step 4
PRESS the DISP button to ENTER Programming Mode.
- Program Remote
WHEN the message “PUSH FOB” is displayed, PRESS and HOLD the LOCK and UNLOCK buttons at the same time on the first remote to be programmed for 15 seconds. The vehicle will sound to indicate successful programming of the remote.
- Program Additional Remotes
REPEAT Step 7 for any additional remotes to be programmed, including existing ones.
- Exit Programming Mode
SCROLL until “EXIT” appears on the display. PRESS the DISP button to EXIT Programming. The Vehicle will sound to indicate successful EXIT of Programming Mode.
- Test Remotes
TEST all remotes. Programming is complete.
- Share
If these programming instructions helped save you time and money, please consider sharing our website with friends and family so they can do the same.
Time needed: 5 minutes.
![]()
PROCEDURE #2 - VEHICLES WITHOUT DRIVER INFO CENTER BUTTONStep-By-Step How To Programming Instructions
- Insert Key Into Ignition
INSERT key into Ignition and TURN the Ignition to ON/ACC (just shy of cranking engine).
- Enter Programming Mode – Step 1
PRESS the Trip Odometer Reset button until “RELEARN REMOTE KEY” is displayed.
- Enter Programming Mode – Step 2
PRESS and HOLD the Trip Odometer Reset Button for 3 seconds until “REMOTE KEY LEARNING ACTIVE” displays. Vehicle is now in Programming Mode.
- Program Remote
PRESS and HOLD LOCK and UNLOCK buttons at the same time on the first remote for 15 seconds. The vehicle will emit a sound indicating successful programming of the remote.
- Program Additional Remotes
REPEAT Step 4 for any additional remotes to be programmed, including existing ones.
- Exit Programming Mode
TURN ignition OFF and REMOVE key to EXIT Programming Mode.
- Test Remotes
TEST all remotes. Programming is complete.
- Share
If these programming instructions helped save you time and money, please consider sharing our website with friends and family so they can do the same.
Programming Notes:
- Verify the following prior to following these instructions:
- Your vehicle is equipped with keyless entry, and
- You have a key fob remote that is compatible with your vehicle.
- Obtain all remote transmitters for this vehicle. This procedure will erase all previously programmed remotes. You must program all existing and new remotes that you wish to use on the vehicle at this time.
- You may clear your keyless entry system memory by entering programming mode as shown in the steps above.
Time needed: 3 minutes.
![]()
TRANSPONDER KEYStep-By-Step How To Programming Instructions
- Enter Programming Mode – Step 1
ENTER the vehicle and CLOSE the Driver’s door.
- Enter Programming Mode – Step 2
INSERT working Transponder Key into Ignition and TURN to the ‘ON’ position (just prior to cranking engine), WAIT 1 second and TURN back to the OFF position to successfully enter Programming Mode.
REMOVE key from Ignition. - Program Transponder Key
INSERT NEW key into Ignition and TURN to the ‘ON’ position (just prior to cranking engine).
The key is now programmed to your vehicle. - Test Transponder Key
TEST the new Transponder Key. Programming is now complete.
- Program Additional Transponder Keys
To program additional Transponder Keys, simply repeat the procedure.
- Share
If these programming instructions helped save you time and money, please consider sharing our website with friends and family so they can do the same.
Programming Notes:
- Verify the following prior to following these instructions:
- You have a transponder key that is compatible with your vehicle.
- You MUST have 1 working transponder key in order for this procedure to work for your vehicle.
- If you DO NOT have 1 working transponder key, you MUST have the key programmed to your vehicle by a professional.
If you have any difficulties with programming your vehicles, contact us at [email protected].

Key fob remotes
2008 GMC Savana Van

MONEY BACK GUARANTEE
We offer a No Questions Asked Money Back Guarantee on all of our products!If you can’t get it to work for your vehicle–reach out!We’ll get you your money back.
FAST & FREE SHIPPING
ALWAYS! First Class USPS shipping is always shipped for free for all Domestic (US) customers in less than ONE business day. No ifs, ands, or buts!

CUSTOMER SUPPORT
Have a question for us? Reach out! We're here for you. We will work with you to solve your issue rather than just having you return an item without a solution like some of the big box online stores do.
SAVE 70% OVER DEALERSHIPS
We’ve worked hard to create a network of reliable and reasonably priced suppliers that allow us to give you rock bottom prices.You're also not paying for huge fancy offices or sports cars for our Owners. We always will be just regular people tryin’ to make a livin’ not a killin’!
- We worked hard to provide these instructions to our customers. We checked multiple sources to ensure that this information is complete and accurate. However, please understand that we cannot be held liable for any loss due to incorrect use of the programming instructions from www.northcoastkeyless.com.
- If you cannot program your remote with the instructions that we provide or encounter any discrepancies, please contact us at [email protected] and we’ll make sure that you’re taken care of.


