


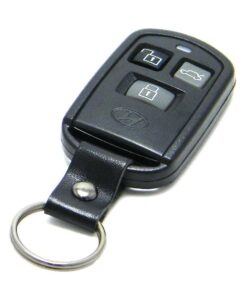
Easy to Follow Step-by-step Key fob remote Programming Instructions
2004 Hyundai XG350
We strive to provide convenience to our customers with free keyless entry remote fob programming instructions for every single vehicle that we sell on NorthCoast Keyless.
Many people don’t know that they can purchase their own replacement vehicle entry remote, save up to 70% off of marked up Dealership prices, and program the replacement remote to their vehicle themselves. We know how good it feels to save money and do something yourself; and we aim to make it as painless as possible for you!
Free Key Fob Remote Programming Instructions for a 2004 Hyundai XG350
Time needed: 5 minutes.
![]()
KEY FOB REMOTEStep-By-Step How To Programming Instructions
- Enter Programming Mode – Step 1
ACCESS the keyless remote receiver module beneath the Driver’s Dashboard, right above the fuse panel. There will be a BLACK and WHITE wire leading from the module. The wires may or may not lead to a Valet Switch.
- Enter Programming Mode – Step 2
INSERT key into the ignition and TURN ignition to the ON position (just shy of cranking engine).
- Enter Programming Mode – Step 3
PERFORM one of the following steps:
IF the black and white wires DO lead to a Valet Switch – PRESS the switch 13 times.
IF the black and white white DO NOT lead to a Valet Switch – TOUCH the metal ends of the wires together 13 times. - Program Remote – Step 1
PRESS Button 1 on the remote to be programmed.
- Program Remote – Step 2
TURN Ignition back to the OFF position.
- Program Remote – Step 3
PRESS Button 1 on the remote to be programmed AGAIN. Doors should cycle LOCK/UNLOCK.
- Program Remote – Step 4
TURN Ignition to the ON position (just shy of cranking engine).
- Program Remote – Step 5
PERFORM one of the following steps:
IF the black and white wires DO lead to a Valet Switch – PRESS the switch 14 times.
IF the black and white white DO NOT lead to a Valet Switch – TOUCH the metal ends of the wires together 14 times. - Program Remote – Step 6
PRESS Button 2 on the remote to be programmed.
- Program Remote – Step 7
TURN Ignition to the OFF position.
- Program Remote – Step 8
PRESS Button 1 on the remote to be programmed.
- Test Remotes
TEST all remotes. Programming is now complete.
- Share
If these programming instructions helped save you time and money, please consider sharing our website with friends and family so they can do the same.
Programming Notes:
- Verify the following prior to following these instructions:
- Your vehicle is equipped with keyless entry, and
- You have a key fob remote that is compatible with your vehicle.
- Obtain ALL remote transmitters for this vehicle.
If you have any difficulties with programming your vehicles, contact us at [email protected].
Key fob remotes
2004 Hyundai XG350
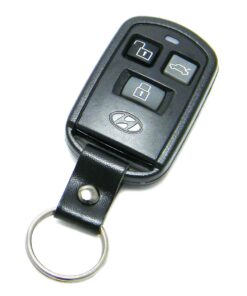
Hyundai
Price range: $29.94 through $39.94

MONEY BACK GUARANTEE
We offer a No Questions Asked Money Back Guarantee on all of our products!If you can’t get it to work for your vehicle–reach out!We’ll get you your money back.
FAST & FREE SHIPPING
ALWAYS! First Class USPS shipping is always shipped for free for all Domestic (US) customers in less than ONE business day. No ifs, ands, or buts!

CUSTOMER SUPPORT
Have a question for us? Reach out! We're here for you. We will work with you to solve your issue rather than just having you return an item without a solution like some of the big box online stores do.
SAVE 70% OVER DEALERSHIPS
We’ve worked hard to create a network of reliable and reasonably priced suppliers that allow us to give you rock bottom prices.You're also not paying for huge fancy offices or sports cars for our Owners. We always will be just regular people tryin’ to make a livin’ not a killin’!
NorthCoast Keyless Free Programming Instructions Disclaimer:
- We worked hard to provide these instructions to our customers. We checked multiple sources to ensure that this information is complete and accurate. However, please understand that we cannot be held liable for any loss due to incorrect use of the programming instructions from www.northcoastkeyless.com.
- If you cannot program your remote with the instructions that we provide or encounter any discrepancies, please contact us at [email protected] and we’ll make sure that you’re taken care of.
Hi, Just to clear up something. When you mention (the plate under the steering column). Do you mean the bottom cover of the steering column itself or the the plastic cover right undernes=ath that above the stop/ gas pedal ?
i lost my remote for kraa alarm don’t know witch one to by
On 2004 & 2005 Hyundai XG350 models, the ETACS module, which holds the memory for the remote keyless entry fobs, is located on the back side of the fuse box panel, adjacent to the driver’s side kick panel. There is no immediate access, so to speak, because it’s BETWEEN the side fender cowl and the parking brake assembly. One you move the parking brake pedal assembly out of the way, the BLACK ETACS module is right above – it plugs into the backside of the GRAY fuse panel assembly with a large push-clip release on the top. Press the large clip while gently rocking the module side to side to release it from the fuse panel. There are electrical connecting pins located on the front side on the module that plug into the fuse panel, in addition to two smaller plug connectors on the side of the module. To begin the programming process, you first need to remove the lower dash panel beneath the steering column (six Philips head screws total – one in each of the lower corners, one behind the ‘cruise control / TCS / dimmer’ switch panel, one on the underside of the parking brake release handle, and two holding the parking brake release assembly). Carefully remove the plastic panel – there is a wedge-style clip on each side of the steering column, and one additional clip adjacent to the ignition switch), then you remove the metal knee brace (two 10mm lower bolts in plain sight, two upper 10mm nuts that are somewhat recessed). Then, remove the two 10mm bolts that hold the parking brake release cable flange to the flimsy pot-metal parking brake release bracket (be careful not to torque it), and lastly, remove three 12mm nuts holding the parking brake assembly in place. Disconnect the black ‘parking brake warning lamp’ plug, and then remove the white ‘parking brake warning lamp’ connector retainer from the parking brake assembly. Carefully move the entire assembly towards the accelerator pedal and out of your way, making certain to avoid catching the steering column wiring as well as the ‘stop lamp switch’ mounted on the brake pedal assembly. There is an odd step in the programming process – the “SET / OFF” switch is located on the *opposite* side of the module as the two side connectors are, towards the ‘firewall’ end of the module, and it’s recessed. While you do not need to unplug the two side connectors, you may likely find it necessary to unplug the module from the FUSE PANEL, simply to gain access to the switch, move the switch to “SET”, plug the module back in, program your remotes, unplug the module and move the switch back to “OFF”, and plug the module in again. The programming instructions shown above are correct, and keep in mind, your vehicle can ONLY accept two remote fobs in memory.
Where exactly is the switch? Thank you for your awesome steps. I found the etacs and just need to find the switch now.
I followed your steps and found the etacs module. but unfortunately I am not able to find the switch for the programming. It’s not on the module or the fuse block or anywhere. Any suggestions?
Hi Jeff,
Thanks for reaching out. If your module doesn’t have a switch then it means that either A) you don’t have keyless entry installed or, if you have had a key fob previously, B) your vehicle will require professional programming.
Best,
NorthCoast Support
I have a key fob for it already that is programmed. It works just fine. I am just trying to get a spare one programmed for emergency situations. After doing more research, I found out that the ETACS that is in my car now doesn’t have a switch because it is a newer design that requires a his can pro or tech2. I’ll have to pull some strings with my contacts. Thank you for all of your assistance! You guys rock! The dealer didn’t even know where the module was or what an etacs was….kinda scary.
XG350 2005
They made it difficult to access this switch, but Jay described exactly where the switch is. I pissed off and switched the switch to the right side and now I have access to the switch without undressing the handbrake. And most importantly, the way to encode a remote control is different from what you write here,
1-I have coded the remote control simply by switching to “set” (I did not put the key in the ignition)
2- then, I pressed the lock on the remote, on the new one and on the old one I had
3- switched to off
and that’s all,
I repeat it again, you do not have to put the key in the ignition.
The entire coding process of the remote control is only from the switch level
Regards, colleagues from the USA
Anton from Poland